Herringbone Kitchen Backsplash in Thornton
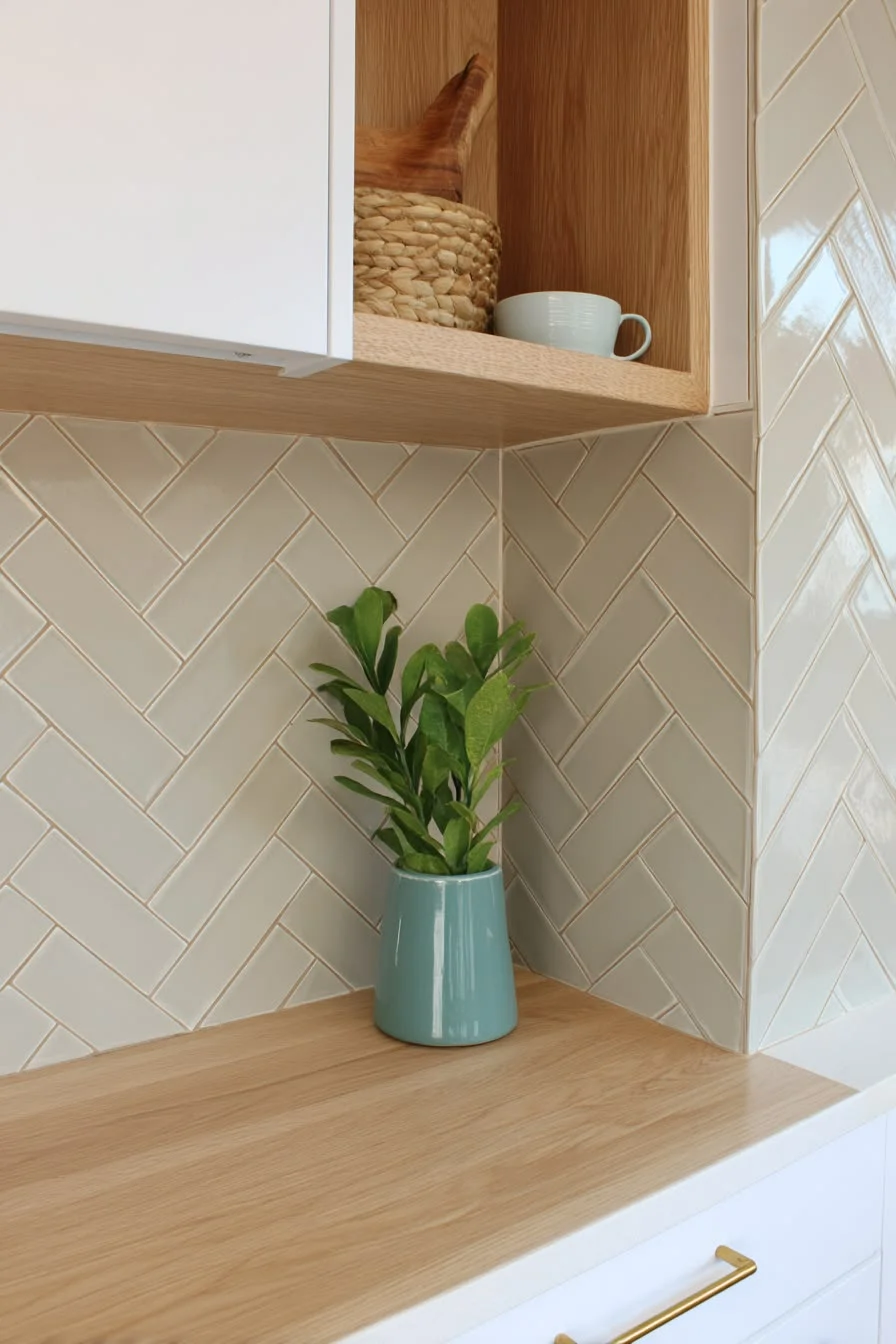
This kitchen backsplash in a Thornton home replaced a painted drywall surface between the countertop and the upper cabinets. The homeowner chose a 2x4 beige ceramic tile in a 45-degree herringbone pattern, which required careful layout planning to keep the V-points centered on the range hood rather than landing awkwardly off to one side. We dry-laid the center axis first, then worked outward in both directions before cutting any tile. The result is a balanced pattern that reads as intentional rather than improvised.
The existing drywall was sound, so we installed a moisture-resistant backer board in the area behind the sink before setting tile. Grout is a warm gray sanded grout at 1/8-inch joints, sealed on completion.
Project Details
| Service | Residential Tile Installation |
|---|---|
| Area | Thornton |
| Materials | 2x4 beige ceramic, sanded gray grout |
| Pattern | 45-degree herringbone |
| Scope | Residential kitchen backsplash |
What We Did
Removed old painted drywall section, installed moisture-resistant backer behind sink area
Dry-laid herringbone pattern from center axis to verify balance before any mortar was mixed
Set tile with non-sanded thinset, made all cuts with a wet saw to maintain clean V-points
Grouted with warm gray sanded grout, sealed after 72-hour cure
A kitchen backsplash is one of the most visible surfaces in the home. Getting the layout right before the first tile is set is what separates a result that looks planned from one that looks installed.